A project at work required me to learn three.js, and as I couldn’t find a lot of beginner-friendly guides, I figured why not write one. I’ve divided this tutorial into 2 parts, first, we’ll start with the basics of three.js and then finish off by rendering a 3D model in the browser

Before we start, I think you should know in brief what three.js is
What is Three.js?
Three.js is JavaScript Library and API which uses WebGL to create and display 3D graphics in the browser. (And no you don’t need to learn WebGL for this tutorial)
That’s it, that’s all you need to know for now lol.
Part 1: Hello Cube
Just as your first step in the programming world is by creating “hello world”, think of creating a cube as your first step in the 3D world.
Rendering a basic cube will give you an understanding of what goes into creating different geometries and rendering them. After you’ve mastered this, we can render custom models in the browsers too.
finally writing code
Go ahead and create a basic HTML file (That’s all you need for now, for more complex projects, we can create separate js files )
<!DOCTYPE html>
<html lang="en">
<head>

    <meta charset="UTF-8">
    <meta name="viewport" content="width=device-width, initial-scale=1.0">
    <title>ThreeJS practice</title>
		<style>
		        body {
		            margin: 0;
		        }

		        canvas {
		            width: 100%;
		            height: 100%;
		        }
		    </style>
</head>
<body>
    <script src="https://cdnjs.cloudflare.com/ajax/libs/three.js/r120/three.min.js" integrity="sha512-kgjZw3xjgSUDy9lTU085y+UCVPz3lhxAtdOVkcO4O2dKl2VSBcNsQ9uMg/sXIM4SoOmCiYfyFO/n1/3GSXZtSg==" crossorigin="anonymous"></script>
</body>
</html>
As you can see, we’ve made some basic CSS changes- clearing out the margin and setting canvas to 100% width and height (because that’s where our scene will be rendered.)
For a quick set up, we’ve used a three.js CDN. If you want to add more complexity like shaders, VR, etc I suggest you download Three.js instead of using a CDN. For this tutorial, the CDN works perfectly well.
Now let’s dive into the good stuff-
For rendering any object in three.js, there are 3 cornerstones you need to grasp -Scene, Camera, and Renderer
Scene - This is what actually makes rendering stuff possible in three.js, it also comprises of various properties like background, fog, etc. Our first step should be to set up a scene, this is how we do it
<script>
        var scene = new THREE.Scene();
</script>
By adding scene = new THREE.Scene(); we have set up the scene.
Now we add a camera and a renderer.
Camera - is designed to imitate the way a human eye sees any object. There are 2 types of cameras in three.js - PerspectiveCamera or OrthographicCamera
PerspectiveCamera is the most commonly used one, lets go ahead and add it.
const fov = 75;
const aspect = window.innerWidth / window.innerHeight;
const near = 0.1;
const far = 500;
var camera = new THREE.PerspectiveCamera(fov, aspect, near, far);
As you can see, Perspective Camera takes in 4 fields, these are
- fov- is the field of view, which we have set to 75. this determines how much of the scene can the camera see at a given moment
- aspect-is the aspect ratio. as we will be rendering on the entire window, it makes sense to provide the aspect ratio of it i.e
window.innerWidth / window.innerHeight - near and far- the next 2 fields are the far and near clipping plane. Based on these values, the objects won’t be visible if they are too far or too close to the camera.
That’s it for setting up the camera, now for the final step, setting up the renderer
Renderer-
var renderer = new THREE.WebGLRenderer();
renderer.setSize(window.innerWidth, window.innerHeight);
document.body.appendChild(renderer.domElement);
The renderer is what actually renders scene on the browser, three.js provides various renderers, but the most popular and cross-browser compatible one is WebGLRenderer so we’ve used that.
We’ve set the size of the renderer to the entire width and height of the window by renderer.setSize(window.innerWidth, window.innerHeight);
Then we append the renderer.domElement to the HTML document.
So this is what our entire body tag looks like as of now.
<body>
    <script src="https://cdnjs.cloudflare.com/ajax/libs/three.js/r120/three.min.js"
        integrity="sha512-kgjZw3xjgSUDy9lTU085y+UCVPz3lhxAtdOVkcO4O2dKl2VSBcNsQ9uMg/sXIM4SoOmCiYfyFO/n1/3GSXZtSg=="
        crossorigin="anonymous"></script>
    <script>
        var scene = new THREE.Scene();
        const fov = 75;
        const aspect = window.innerWidth / window.innerHeight;
        const near = 0.1;
        const far = 500;
        var camera = new THREE.PerspectiveCamera(fov, aspect, near, far);
        var renderer = new THREE.WebGLRenderer();
        renderer.setSize(window.innerWidth, window.innerHeight);
        document.body.appendChild(renderer.domElement);

    </script>
</body>
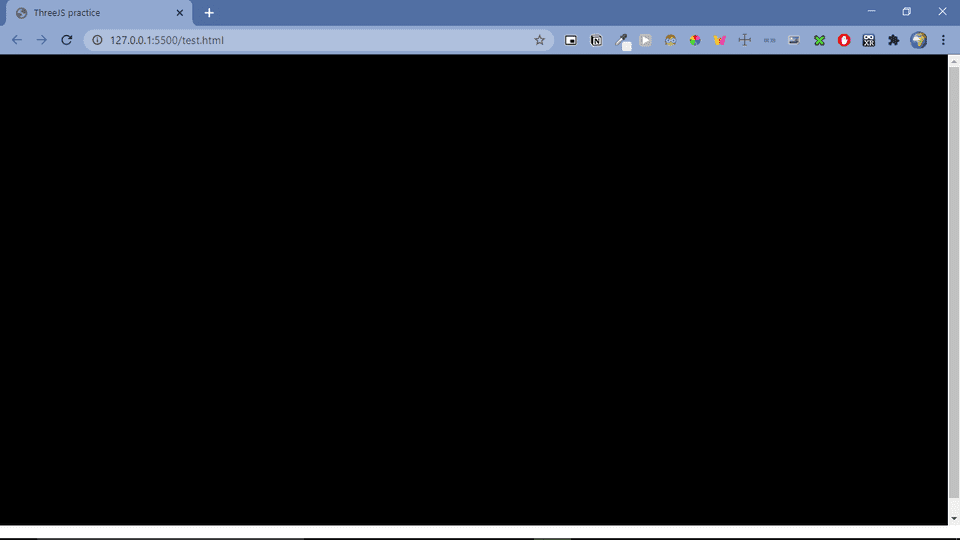
Hopefully, now when you open your HTML file with a browser or liveserver . you will see this.

But where is the Cube you promised?
We are getting there, add this to the script
var geometry = new THREE.BoxGeometry();
var material = new THREE.MeshBasicMaterial( { color: 0xF4CCCC } );
var box = new THREE.Mesh( geometry, material );
scene.add( box );

camera.position.z = 5;
renderer.render(scene, camera);
What we are doing here is creating a geometry object by var geometry = new THREE.BoxGeometry(); Geometry is what determines the shape of the object. There are many geometries available like ConeGeometry, DodecahedronGeometry, etc
Then we create material using new THREE.MeshBasicMaterial( { color: 0xF4CCCC } ); and give it a color of F4CCCC . Mesh determines if the object is shiny, colorful, textured, etc.
Next by var box = new THREE.Mesh( geometry, material ); we combine both the geometry and the material to make a variable named box with the geometry of a cube and the material of color 00ff00
After that, we add it to the scene using scene.addand render it using renderer.render(scene,camera)
scene.add() is always required to add objects to the scene
The position of the camera is set in the z-direction by camera.position.z = 5; (We will see more about the camera position later)
and voila ! here is you cube ;

…kinda looks more like a square than a cube doesn’t it? that’s because only one side of the cube is facing us. To actually make it look 3D, why don’t we rotate it?
Animations
For animations, we use a loop like this one below
function animate() {
            requestAnimationFrame(animate);
            renderer.render(scene, camera);
            cube.rotation.x += 0.01;
            cube.rotation.y += 0.01;
        }
        animate();
This will create a loop that causes the renderer to draw the scene every time the screen is refreshed (on a typical screen this means 60 times per second)
Remove the renderer.render(scene, camera) outside the loop; and put it inside the animation loop.
By cube.rotation.x += 0.01; cube.rotation.y += 0.01;we can change the rotation of the cube on every frame refresh, so now it looks like its rotating.
This is what our code look like as of now
Great, you’ve just rendered your first 3D object!
To make it look more realistic, we will add lights in our scene.
There are a variety of lights that three.js provides , we will be using DirectionalLight.
const color = 0xFFFFFF;
const intensity = 1;
const light = new THREE.DirectionalLight(color, intensity);
light.position.set(0, 2, 5);
scene.add(light)
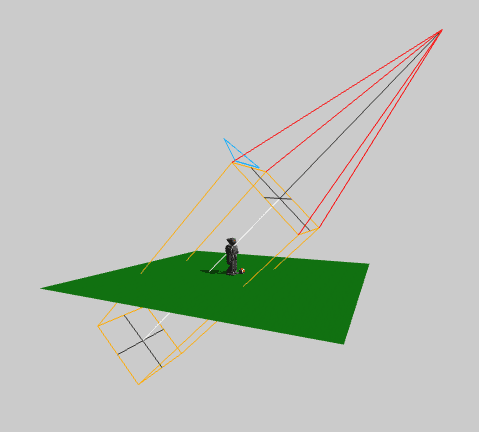
We have provided a color of FFFFFF and intensity of 1 to the DirectionalLight. And set the position of the light to be at (0, 2, 5), the position of the light can be better understood by this figure.

The last step is to modify the material of the cube we made earlier.
So make the var material = new THREE.MeshBasicMaterial( { color: 0xF4CCCC } );var material = new THREE.MeshPhongMaterial({ color: 0xF4CCCC });
Great , now it looks more realistic .
Part 2: Loading 3D Models
Now that you’ve rendered your cube, why don’t we render and actual 3D model?
A “loader” is required to load the model, and as there are a lot of formats available for models, thus Threejs provides a lot of loaders too
For this project we will be using models with GLTF format, hence we will need a GLTFLoader .( Think of GLTF as the JPG of 3D )
Sketchfab is a great site that provides tons of 3D content. I will be using this model of Lamborghini Terzo
For adding the loader and other functionality that we will see later, we require some files ( GLTFLoader.js,OrbitControls.js and three.module.js). As the three.js master folder can take a while to download, I’ve created a repo that contains the appropriate files which we require and deleted out the unwanted ones, you could download/clone the repo and start work on it directly. In the repo, there is a solution.html you can refer to if you face any errors in your code.
After the file setup is done
<!DOCTYPE html>
<html lang="en">

<head>
    <meta charset="UTF-8">
    <meta name="viewport" content="width=device-width, initial-scale=1.0">
    <title>ThreeJS practice</title>
    <style>
        html {
            margin: 0;
            background: rgb(195, 188, 191);
            background: radial-gradient(circle, rgba(195, 188, 191, 1) 0%, rgba(59, 56, 56, 1) 100%);
        }

        body {
            overflow: hidden;
        }

        canvas {
            width: 100%;
            height: 100%;
        }
    </style>
</head>

<body>
    <script type="module">
        import * as THREE from "./build/three.module.js"
        import { GLTFLoader } from "./jsm/loaders/GLTFLoader.js";

    </script>
</body>

</html>
In the HTML, we’ve made the same style changes we saw earlier, along with a background gradient.
Unlike the previous project , this time we wont be using a CDN for three.js .
In the script tag, we import three.js and we include a GLTFLoader too. If you are confused about how import statements work, please check out
Great, now that we have three.js and out GLTFLoader set up, we can add the 3 cornerstones we discussed earlier- scene, camera, and the renderer.
				//set up the scene
        const scene = new THREE.Scene();

        //set up the camera
        const fov = 75;
        const aspect = window.innerWidth / window.innerHeight;
        const near = 0.1;
        const far = 500;
        const camera = new THREE.PerspectiveCamera(fov, aspect, near, far);
        camera.position.set(0, 2, 10);

				//set up the Renderer
        const renderer = new THREE.WebGLRenderer({ alpha: true });
        renderer.setSize(window.innerWidth, window.innerHeight);
				document.body.appendChild(renderer.domElement);
        renderer.setClearColor(0x000000, 0.0);

				//the animation function
				function animate() {
            requestAnimationFrame(animate);
            renderer.render(scene, camera);
        }
        animate();
While adding the renderer, we have set the alpha as true. This makes the scene transparent and allows us to set the background color from our CSS. renderer.setClearColor(0x000000, 0.0); also serves the same purpose .
Adding the GLTF file
        camera.position.set(0, 2, 10);
				const loader = new GLTFLoader();
        var lambo;
        loader.load('./scene.gltf', function (gltf) {
            lambo = gltf.scene;
            lambo.scale.set(3, 3, 3)
            scene.add(lambo);


        }, undefined, function (error) {

            console.error(error);

        });
The name of our Lamborgini model is scene.gltf, we are passing its path to the loader, and then we add it to the scene.
Before adding it to the scene , we have renamed it to lambo and scaled it up a bit.

So we can see the model now , but its dimly lit .
Hence we’ll add a directional light like we did in the cube example
		var directionalLight = new THREE.DirectionalLight(0xffffff, 5);
        directionalLight.position.set(0, 15, 0);

        scene.add(directionalLight);
Now that the model is easily visible , we add the rotation animation to the car .
This just means adding lambo.rotation.y += 0.01; to our animation function .

But what if we want to zoom in, pan the model? For this feature, we require orbit control. Orbit controls allow the camera to orbit around a target. Where we’ve imported three.js and GLTFloader, add this
import { OrbitControls } from "./jsm/controls/OrbitControls.js";Lastly add this code after creating the renderer
const controls = new OrbitControls(camera, renderer.domElement);Congrats , you just rendered your first model in three.js
Just the tip of the iceberg
What we covered in this tutorial is just the tip of the iceberg, there are a lot more complex projects you can make with three.js. Three.js homepage has some fantastic projects which you can seek inspiration from.